infra 구축(apache, tomcat, mysql, rsyslog)

1. 웹서버(apache, tomcat) - DMZ 존(*보통 was는 내부 네트워크에 위치시키지만 여기서는 간단한 실습이기 때문에 이렇게 배치하였음)
- web server와 was server 분리
2. Database 서버
3. 로그 서버

1. 웹서버
- ubuntu server(22.04.01)
- ip: 192.168.52.10
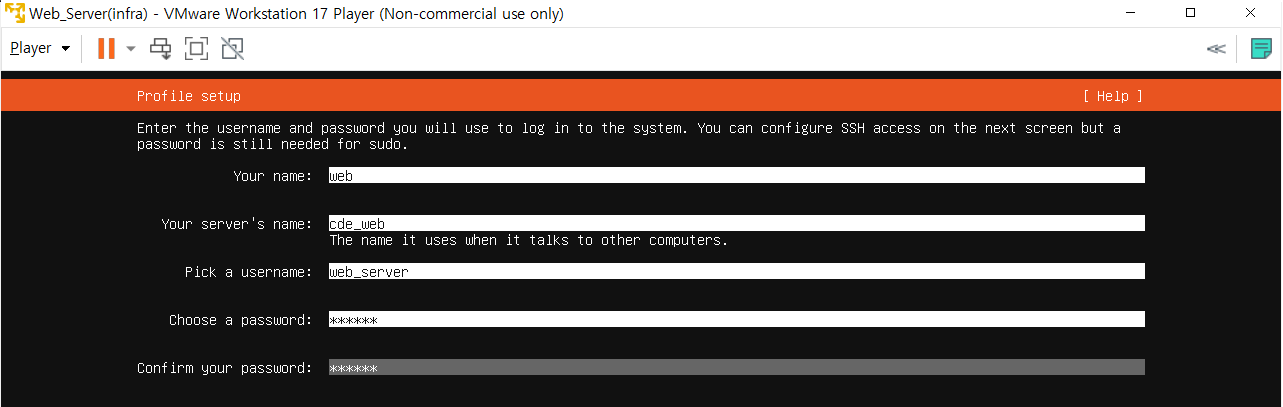
password: ubuntu
- sudo apt update
- sudo apt install apache2
- apache2 -V //버전 확인 -> 2.4.52
- cd /etc/netplane
- sudo vi 00-installer-config.yaml (아래와 같이 작성)

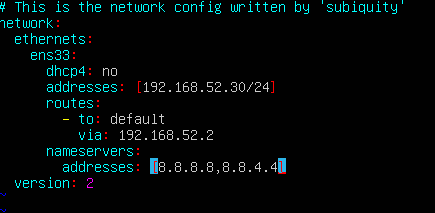
- sudo netplan apply
- ping 8.8.8.8 //네트워크 확인
- sudo apt-get install tomcat9 tomcat9-admin tomcat9-common tomcat9-user
- ss -ltn // 8080 포트 돌아가고 있는지 확인


apache와 tomcat을 연동하는 이유
아파치는 HTML, CSS, 자바스크립트 파일과 같은 정적 콘텐츠를 제공하는 편리한 방법을 제공하는 반면, 톰캣은 자바 서블릿과 JSP 페이지와 같은 동적 콘텐츠를 제공하는 강력한 기능을 제공하기 때문에 종종 함께 연결된다. Apache와 Tomcat을 연결하면 두 기술의 장점을 모두 활용하여 강력하고 효율적인 웹 애플리케이션을 구축할 수 있습니다.
다음은 일반적으로 Apache와 Tomcat 간의 링크 작동 방식입니다:
Apache는 클라이언트로부터 HTTP 요청을 수신하고 요청을 검사하여 Tomcat에서 처리해야 하는지 여부를 결정합니다.
Java 서블릿과 같은 동적 리소스에 대한 요청인 경우 Apache는 mod_jk 또는 mod_proxy_ajp와 같은 커넥터를 사용하여 요청을 Tomcat에 전달합니다.
Tomcat은 요청을 처리하고 동적 콘텐츠를 생성하여 Apache로 다시 전송합니다.
Apache는 원래 요청에 대한 응답의 일부로 클라이언트에 동적 콘텐츠를 제공합니다.
이러한 방식으로 Apache와 Tomcat을 연결하면 Apache의 강력한 보안 기능, 성능 최적화 및 유연한 구성 옵션을 활용하는 동시에 Tomcat의 강력한 동적 컨텐츠 처리 기능을 활용할 수 있습니다. 또한 Apache와 Tomcat을 연결하면 Apache를 역방향 프록시로 사용할 수 있으므로 웹 응용 프로그램의 보안과 성능을 향상시킬 수 있습니다.
- apache와 tomcat 연동하기
- sudo apt-get install libapache2-mod-jk //Apache와 Tomcat을 연결하기 위해 mod_jk 커넥터 설치
- cd /etc/libapache2-mod-jk/
- sudo vi workers.properties

- tomcat8을 tomcat9으로 수정 후 저장


- JkWorkersFile의 경로 확인(/etc/libapache2-mod-jk/workers.properties)
- sudo vi /etc/tomcat9/server.xml 설정 변경


- sudo service apache2 restart
- sudo service tomcat9 restart
- forbidden error 시 apache의 /etc/apache2안에 있는 sudo vi apache2.conf에서 권한을 변경해줌
- apache directory 권한 설정(https://aljjabaegi.tistory.com/666)
- sudo tail -f /var/log/apache2/access.log 확인
- sudo tail -f /var/log/tomcat9/localhost_access.log 확인

- sudo apt install libmariadb-java
- 설치가 종료되면, /usr/share/java/ 폴더에 m-connector-java-~~.jar 라는 파일이 생성되어 있음 -> 해당 파일을 /usr/share/tomcat9/lib 경로로 옮김
- 리눅스 mysql, 자바 연동 (java.lang.ClassNotFoundException: com.mysql.jdbc.driver 에러) (tistory.com)
- 여기서도 파일을 다운받아 똑같은 경로로 옮김
1-1. Tomcat 분리하기
- sudo apt update
- sudo apt-get install tomcat9 tomcat9-admin tomcat9-common tomcat9-user
- sudo vi /etc/tomcat9/server.xml 설정 변경

- client(apache) 설정 변경
- sudo vi /etc/libapache2-mod-jk/workers.properties

- 박스 친 부분을 tomcat 서버의 ip로 변경
- tomcat의 /var/lib/tomcat9/webapps/ROOT에 jsp 파일 넣기
2. DB 서버
- ubuntu server(22.04.01)
- ip: 192.168.52.20
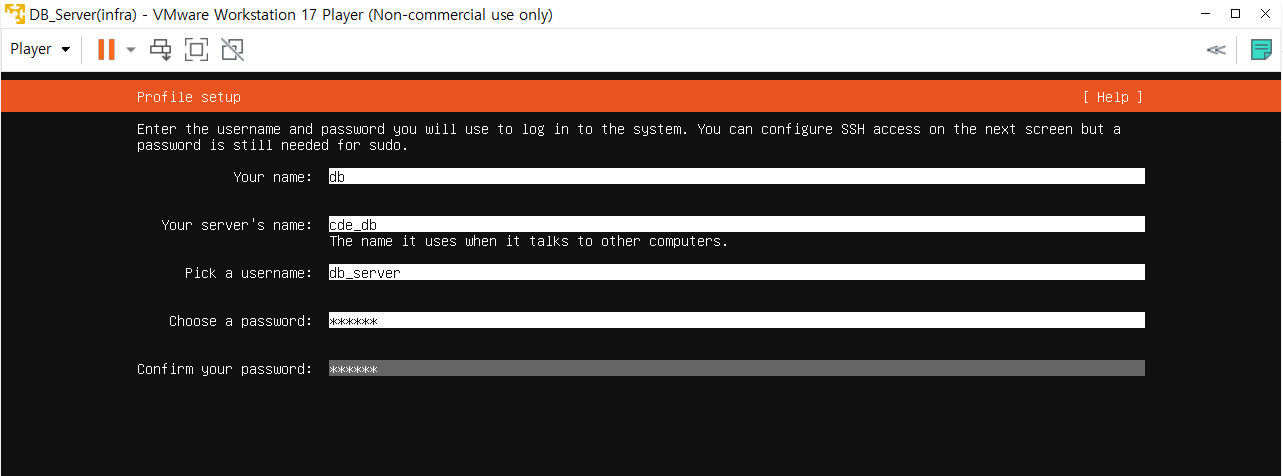
password: ubuntu
- sudo apt update
- sudo apt-get install mysql-server -y
- mysql -V
- sudo mysql -u root -p
- create user cde@'%' identified by 'db'; //사용자 생성
- create database gnuboard;
- grant all privileges on gnuboard.* to cde@'%';
- cd /etc/mysql/mysql.conf.d
- sudo vi mysqld.cnf //설정 파일 수정
- bind-address 127.0.0.1 부분을 주석처리 해줌
- sudo systemctl restart mysql
CREATE DATABASE IF NOT EXISTS notepad;

USE notepad;

CREATE TABLE IF NOT EXISTS notes (
note TEXT NOT NULL,
PRIMARY KEY (note(100))
);- grant all privileges on notepad.* to cde@'%';

2-1. tomcat and mysql 연동하기
- sudo apt install libmariadb-java
- 설치가 종료되면, /usr/share/java/ 폴더에 m-connector-java-~~.jar 라는 파일이 생성되어 있음 -> 해당 파일을 /usr/share/tomcat9/lib 경로로 옮김
- 리눅스 mysql, 자바 연동 (java.lang.ClassNotFoundException: com.mysql.jdbc.driver 에러) (tistory.com)
- 여기서도 파일을 다운받아 똑같은 경로로 옮김
- 파일에서 DB연결 하는곳에 ?allowPublicKeyRetrieval=true&useSSL=false

3. Log 서버
- ubuntu server(22.04.01)
- ip: 192.168.52.30

- sudo apt update
- sudo apt install rsyslog
- sudo vi /etc/rsyslog.conf


- web/was server 종료시 log server로 데이터 넘어옴
1. notepad.html
<!DOCTYPE html>
<html>

<head>
    <title>Simple Notepad</title>
    <script>
        function showMemo() {
            var xhttp = new XMLHttpRequest();
            xhttp.onreadystatechange = function() {
                if (this.readyState == 4 && this.status == 200) {

                    document.getElementById("memo").innerHTML = this.responseText;

                }
            };
            xhttp.open("GET", "show_memo.jsp", true);
            xhttp.send();
        }
    </script>
</head>

<body>
    <h1>Don't forget it</h1>
    <textarea id="note"></textarea>
    <button id="save">Save</button>
    <script src="notepad.js"></script>
    <p>Memo:</p>
    <p id="memo"></p>
    <button onclick="showMemo()">Show Memo </button>
</body>

</html>
2. notepad.js
const note = document.getElementById("note");
const saveBtn = document.getElementById("save");

saveBtn.addEventListener("click", function() {
          const xhr = new XMLHttpRequest();
          xhr.open("POST", "save.jsp", true);
          xhr.setRequestHeader("Content-Type", "application/x-www-form-urlencoded");
          xhr.send("note=" + encodeURIComponent(note.value));
});
3. save.jsp
<%@ page import="java.sql.*" %><% String note = request.getParameter("note");
Connection conn = null;
Statement stmt = null;
try {
	Class.forName("com.mysql.jdbc.Driver");
	conn = DriverManager.getConnection("jdbc:mysql://192.168.52.20: 3306/notepad","cde","db");
	stmt = conn.createStatement();
	stmt.executeUpdate("INSERT INTO notes (note) VALUES ('"+note+"') ON DUPLICATE KEY UPDATE note='"+note+"'");
}
catch (Exception e) {
	e.printStackTrace();
}
finally {
	try {
		if (stmt != null) {
			stmt.close();
		}
	}
	catch (SQLException se2) {
	}
	try {
		if (conn != null) {
			conn.close();
		}
	}
	catch (SQLException se) {
		se.printStackTrace();
	}
}
%>
4. show_memo.jsp
<%@ page import="java.sql.*" %><% Connection conn = null;
Statement stmt = null;
ResultSet rs = null;
try {
	Class.forName("com.mysql.jdbc.Driver");
	conn = DriverManager.getConnection("jdbc:mysql://192.168.52.20:3306/notepad?allowPublicKeyRetrieval=true&useSSL=false","cde","db");
	stmt = conn.createStatement();
	rs = stmt.executeQuery("SELECT * FROM notes");
	while (rs.next()) {
		out.println(rs.getString("note")+"<br>");
	}
}
catch (Exception e) {
	out.println("Error:"+e.getMessage());
}
finally {
	try {
		if (rs != null) {
			rs.close();
		}
		if (stmt != null) {
			stmt.close();
		}
		if (conn != null) {
			conn.close();
		}
	}
	catch (SQLException e) {
		out.println("Error: "+e.getMessage());
	}
}
%>
*DMZ 존과 내부 네트워크를 분리하였으므로 중간에 네트워크 장비까지 설정하여 네트워크를 할당하여야 하지만 시간 관계상 "구축"에만 집중하였음..
참고 사이트
https://sansan2.tistory.com/26
우분투 리눅스 아파치2/ 톰캣9 연동
1. apache2, tomcat9, jdk 설치 apt update apt install apache2 apt install default-jdk apt install tomcat9 tomcat9-admin 간단하게 아파치, 톰캣이 설치된다 *톰캣을 사용하라면 java가 설치되어있어야 됨 2. 연동 방법 선택 아
sansan2.tistory.com