
선릉역 1번 출구
배경화면 변경 프로그램 만들기 본문
1. 코드 작성
import tkinter as tk
import ctypes
from tkinter import filedialog
from PIL import ImageTk, Image
# 배경화면 변경 함수
def set_wallpaper(file_path):
# 파일 경로에 대한 이미지 열기
image = Image.open(file_path)
# 이미지 크기 조절
user32 = ctypes.windll.user32
screensize = user32.GetSystemMetrics(0), user32.GetSystemMetrics(1)
image = image.resize(screensize)
# 이미지를 bmp 파일로 저장
image.save('temp_wallpaper.bmp')
# 레지스트리에 배경화면 경로 설정
reg_key = 'Control Panel\\Desktop'
ctypes.windll.user32.SystemParametersInfoW(20, 0, file_path, 0)
# 배경화면 변경 확정 버튼 함수
def apply_wallpaper():
global current_wallpaper
global previous_wallpaper
if current_wallpaper is not None:
previous_wallpaper = get_wallpaper_path()
set_wallpaper(current_wallpaper)
# 이전 배경화면으로 되돌리기 버튼 함수
def undo_wallpaper():
global previous_wallpaper
if previous_wallpaper is not None:
set_wallpaper(previous_wallpaper)
# 파일 열기 창 열기
def open_file():
global current_wallpaper
# 파일 경로 선택
file_path = filedialog.askopenfilename(filetypes=[('Image Files', ['.jpg', '.jpeg', '.png', '.bmp'])])
if file_path:
# 현재 배경화면 저장
current_wallpaper = file_path
# 라벨 업데이트
image = Image.open(file_path)
image = image.resize((200, 200))
photo = ImageTk.PhotoImage(image)
image_label.configure(image=photo)
image_label.image = photo
SPI_GETDESKWALLPAPER = 0x0073
MAX_PATH = 260
def get_wallpaper_path():
buf = ctypes.create_unicode_buffer(MAX_PATH)
ctypes.windll.user32.SystemParametersInfoW(SPI_GETDESKWALLPAPER, MAX_PATH, buf, 0)
return buf.value
# 전역 변수 초기화
current_wallpaper = None
previous_wallpaper = get_wallpaper_path()
# tkinter 윈도우 생성
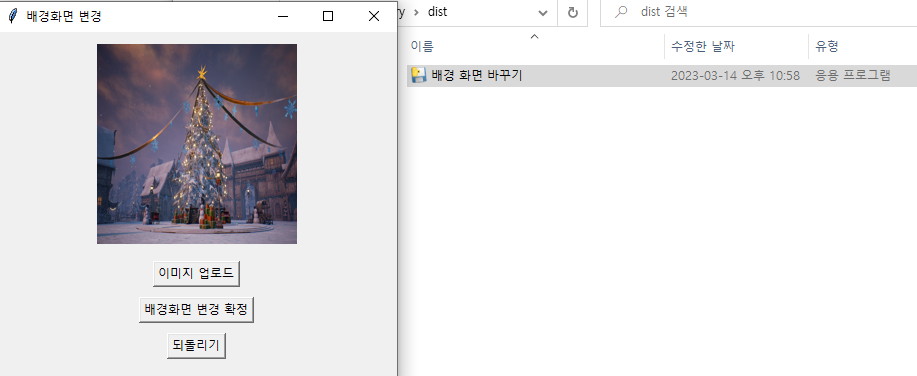
root = tk.Tk()
root.title('배경화면 변경')
root.geometry('400x350')
# 이미지 라벨 생성
image_label = tk.Label(root)
image_label.pack(pady=10)
# 버튼 생성
upload_button = tk.Button(root, text='이미지 업로드', command=open_file)
upload_button.pack(pady=5)
apply_button = tk.Button(root, text='배경화면 변경 확정', command=apply_wallpaper)
apply_button.pack(pady=5)
undo_button = tk.Button(root, text='되돌리기', command=undo_wallpaper)
undo_button.pack(pady=5)
# tkinter 윈도우 실행
root.mainloop()
2. pyinstaller 설치
pip install pyinstaller
3. 컴파일
pyinstaller --onefile --noconsole 파일 이름.py
4. 프로그램 실행
'Language > Python' 카테고리의 다른 글
| 람다 함수 (0) | 2022.09.07 |
|---|---|
| 얕은 복사와 깊은 복사 (0) | 2021.10.22 |
'Language/Python' Related Articles
more

Comments